
When To Start A Crypto Grid Bot
Learn when to start crypto grid bots for maximum profits. Discover a simple strategy to spot entry signals, reduce risk, and take advantage of crypto market volatility.
If you’ve been trading crypto for a while, you’ve probably heard of grid bots. They’re one of the most reliable tools for profiting from market volatility. They work by automating buy and sell orders within a set range, capturing small gains over and over again.
A crypto grid bot is only as good as its settings. Without proper configuration, your bot might underperform or even fail to trade altogether.
This post walks you through one of the simplest strategies for setting up your crypto grid bot. It’s designed to be easy to follow and quick to implement, even if you’re new to automated trading.
Think of this guide as your starting point. A clear foundation you can build on as you develop more advanced strategies.
The first thing to decide is how much capital you want to commit to your bot.
When trading a crypto pair like BTC/USDT, your investment amount is in the second ticker coin. In this case, USDT, which is usually a stablecoin. Profits are also earned in that same ticker. Here are a couple of practical guidelines.

Many Sources recommend at least 3,000 USDT. You can start smaller, but expect to adjust your settings accordingly.
Don’t put all your funds into a single bot. Holding back about 20% of your capital gives you flexibility. If the market dips and one bot goes out of range, you’ll have extra funds to recover with a new setup.
A well-funded bot gives you more grids to work with or a wider range. It’s up to the user to decide how much capital to use based on their setups and number of bots.
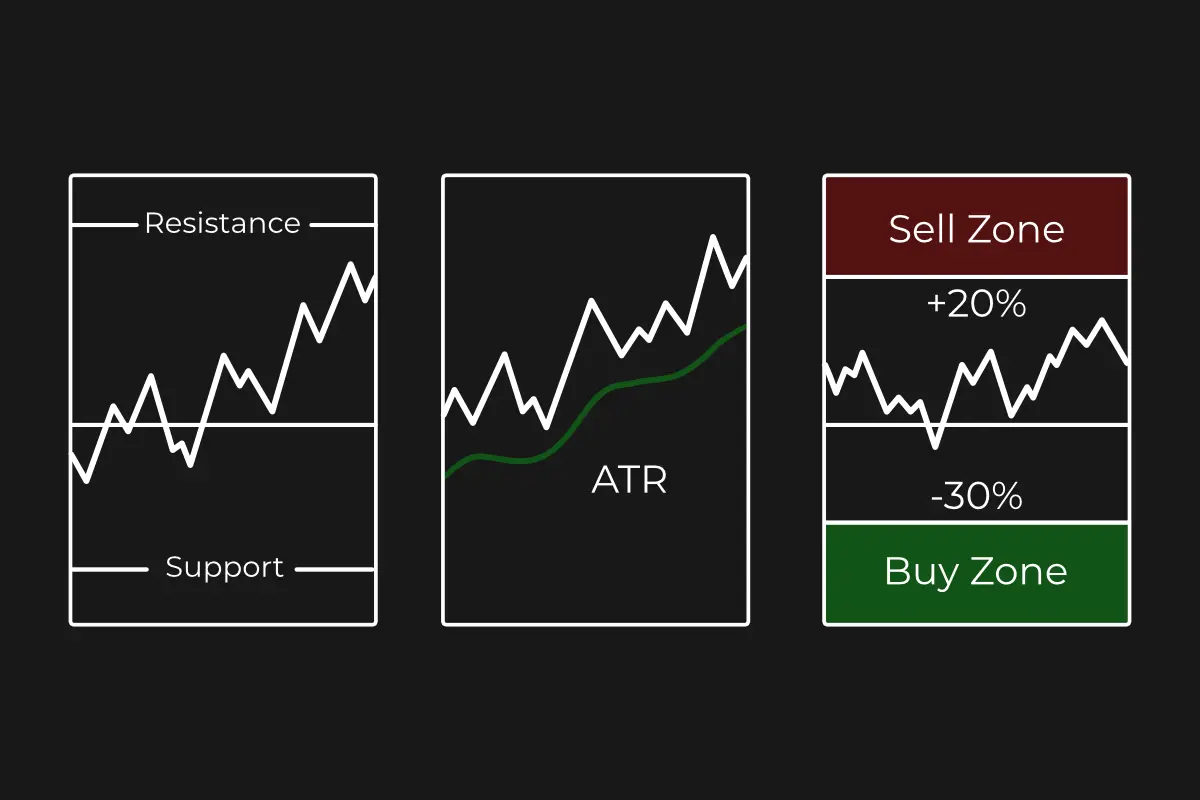
Next, you’ll want to define the upper and lower limits for your grid bot (price range) where it will operate. Here are two simple rules (fixed percentage grid).

This is where your final sell order will trigger. To calculate it, take the current market price and measure 20% up using a charting tool.
Do the same in the opposite direction, but measure 30% down from the current price.
These limits draw a zone around your trading zone. Inside that zone is where your bot will buy and sell, capturing profits from volatility.
Now you need to decide how many grid you’ll use and how dense they’ll be.
More grids mean more frequent trades, but also smaller profit per trade. Fewer grids mean bigger profit per trade but fewer opportunities.

There isn’t a single go-to when it comes to grid number:
Grid Density is the percentage distance between each grid. A solid start point is 0.5-1.5%.
What you need to know about grid density:
The goal here is balance! Enough grids to capture moves, but not so many that your capital gets spread too thin.
Most modern crypto grid bots come with features like trailing, take profit, and stop loss.
Trailing up moves your grid higher as the market climbs. Useful, but not required.
Trailing Down follows the market lower. For this strategy, it’s usually skipped, since it can drag your bot into prolonged losses.

Take Profit (TP) lets you set a goal, like a 20% increase, and close the bot when it’s hit. It’s optional here because profits are made continuously inside the grid, but it can be a safeguard if you want to lock in gains.
Stop Loss (SL) stops your bot when the market falls below your grid range. In practice, it’s often better to wait for a bounce rather than exit too early.

If you prefer precision, you can skip trailing and reconfigure (or re-grid) your bot whenever the price moves outside your range.
Sooner or later, some bots run into this issue: the market moves fast, and your bot falls “out of range.¨
When that happens avoid emotional trading:
This patient approach prevents you from panicking or closing bots too early.
You can build bots that profit from crypto volatility, over and over again.
But remember crypto grid bots aren’t fire-and-forget tools. They’re most effective when you treat them as part of a bigger strategy.
And strategies don’t always work all the time. Markets change and strategies also change. The post should get your gears grinding so that you might build your own strategy in the future.

Learn when to start crypto grid bots for maximum profits. Discover a simple strategy to spot entry signals, reduce risk, and take advantage of crypto market volatility.
Price ranges make or break your grid bot. This guide shows 3 strategies, when to use them, and how to match them to any coin or market phase.
Turn crypto grid bot profits into long-term wealth! Learn fund allocation, track earnings, and reinvest in CeFi, DeFi, staking, and more for passive income.
